
If you’ve been letting your sourdough discard pile up in the fridge, this is your sign to turn it into the best homemade pizza night you’ve had in a while.

This sourdough discard pizza dough recipe is honestly one of my favorite ways to use discard, it’s low-effort, incredibly flexible, and produces a soft, fluffy crust with just the right amount of chew. No stretch-and-folds, no babysitting the dough, no complicated timeline. Just mix, rest, and bake. You can make it the same day when you’re short on time, or let it slowly ferment overnight for a deeper flavor and easier digestion.
What makes this sourdough discard pizza crust different
Most sourdough discard pizza dough recipes add a packet of instant yeast to speed things up. This one doesn’t. Instead, it uses buttermilk to bring both tenderness and a boost of natural acids that support the discard’s fermentation. The result is a softer, more pillowy crust with a slightly complex flavor that you just don’t get from flour, water, and yeast alone.
Buttermilk also acts as a natural tenderizer. The mild acidity weakens the gluten structure just enough to give you that soft, pull-apart texture in the crumb while still holding its shape when you bite in. It’s a small swap that makes a genuinely noticeable difference.
And yes, if you’ve ever wondered – is sourdough pizza healthy? – the answer is more or less yes. The fermentation process, even with discard, partially breaks down the gluten and phytic acid in the flour, which makes it easier to digest and the minerals more bioavailable than a standard yeasted dough. It’s still pizza. But it’s pizza you can feel a little smug about.
Jump to:
Why You’ll Love This Recipe
- No yeast needed: the sourdough discard and buttermilk do all the work. No packet of instant yeast required.
- Works same day or overnight: 30 minutes of resting gets you a workable dough; overnight in the fridge gets you something better.
- Buttermilk makes it softer: this is the ingredient none of the other recipes have, and you’ll taste the difference.
- One bowl, minimal cleanup: mix, knead briefly, rest. That’s genuinely it.
- Uses up discard: fresh discard, week-old fridge discard, active starter, all of it works here.
- Flexible for any topping situation: classic red sauce, white pizza, personal-size – this dough handles everything.
Ingredients
Here’s what goes in the bowl, and why each one earns its place:
- All purpose flour: the base. All purpose gives you a soft, pliable crust with a tender crumb. Bread flour works too if you want more chew and structure. For a more Neapolitan-style result, 00 (double zero) flour is worth trying if you have it, it gives a silkier, more extensible dough.
- Sourdough discard: You can use discard straight from the fridge, week old discard, or an active starter. Older, more acidic discard will give a slightly tangier crust; fresher discard is more neutral.
- Buttermilk: Its natural acidity and live cultures tenderize the gluten and contribute to a softer, more flavored crumb. If you don’t have buttermilk, plain full-fat yogurt or kefir are your best substitutes.
- Water: added gradually so you can control the hydration. Every flour absorbs differently, so add it bit by bit.
- Olive oil: adds richness, helps the crust brown, and makes the dough more pliable to work with.
- Salt: essential for flavor and for strengthening the gluten structure.
- Honey: just enough to support fermentation activity and round out the flavor. Sugar works the same way.
See the recipe card below for exact quantities.
Substitutions & Variations
- No buttermilk? Use full-fat plain yogurt or kefir in equal amounts. Yogurt is thicker, so add a splash more water to compensate.
- Bread flour vs all purpose: bread flour has higher protein and gives a chewier, more structured bite. Either is great, just expect slightly different textures.
- 00 flour: if you want a silkier, more pliable dough that’s easier to hand-stretch, 00 flour is worth the swap. Use the same amount.
- No honey? Regular granulated sugar works perfectly – same amount.
- Personal-size pizzas: divide the dough into 2-3 smaller balls after kneading and make individual pizzas. Great when everyone wants different toppings.
This recipe has not been tested with all substitutions.
Choose your timeline
One of the best things about this dough is how flexible it is. Pick whichever option fits your day:
| Option | Counter rest | Fridge time | Best for |
|---|---|---|---|
| Same day (quick) | 30-60 min | None | Weeknight, last-minute pizza |
| Afternoon to evening | 2-3 hours | None | A bit more flavor, still same day |
| Overnight cold ferment | 2-3 hours, then fridge | 8-16 hours | Best flavor, plan ahead the night before |
| 2 day cold ferment | 1- 2 hours, then fridge | Up to 48 hours | Deep flavor, maximum flexibility |
The longer you ferment, the more complex the flavor. But the same-day version is still genuinely good – don’t let perfect be the enemy of pizza.
How To Make Cashew Pesto
- Step 1: In a bowl, combine flour, sourdough discard, kefir, olive oil, honey, and salt. Start mixing, then gradually add water until a soft dough forms.
- Step 2: Transfer to a surface and knead for a few minutes until smooth. The dough should feel soft, slightly tacky, but not sticky.
- Step 4: Rest or ferment (your choice)
Follow the timeline table above and choose your method. For the same-day version: cover and rest at room temperature for 30-60 minutes. For overnight: rest 2-3 hours on the counter, then transfer to a covered oiled container in the fridge. You can go straight to the fridge if you’re making the dough in the evening – the counter rest isn’t strictly required, just helpful.
- Step 5: Preheat the oven
At least 30 minutes before baking, place your pizza stone on the middle rack and preheat the oven to 500°F (260°C). If you don’t have a pizza stone, preheat an inverted heavy baking sheet or a cast iron pan – any flat surface that can absorb heat works. The hot surface is what gives you a crispy bottom.
- Step 6: Roll the dough out on parchment paper using flour or fine semolina. Gently fold the edges inward to create a thicker crust. Brush with olive oil.
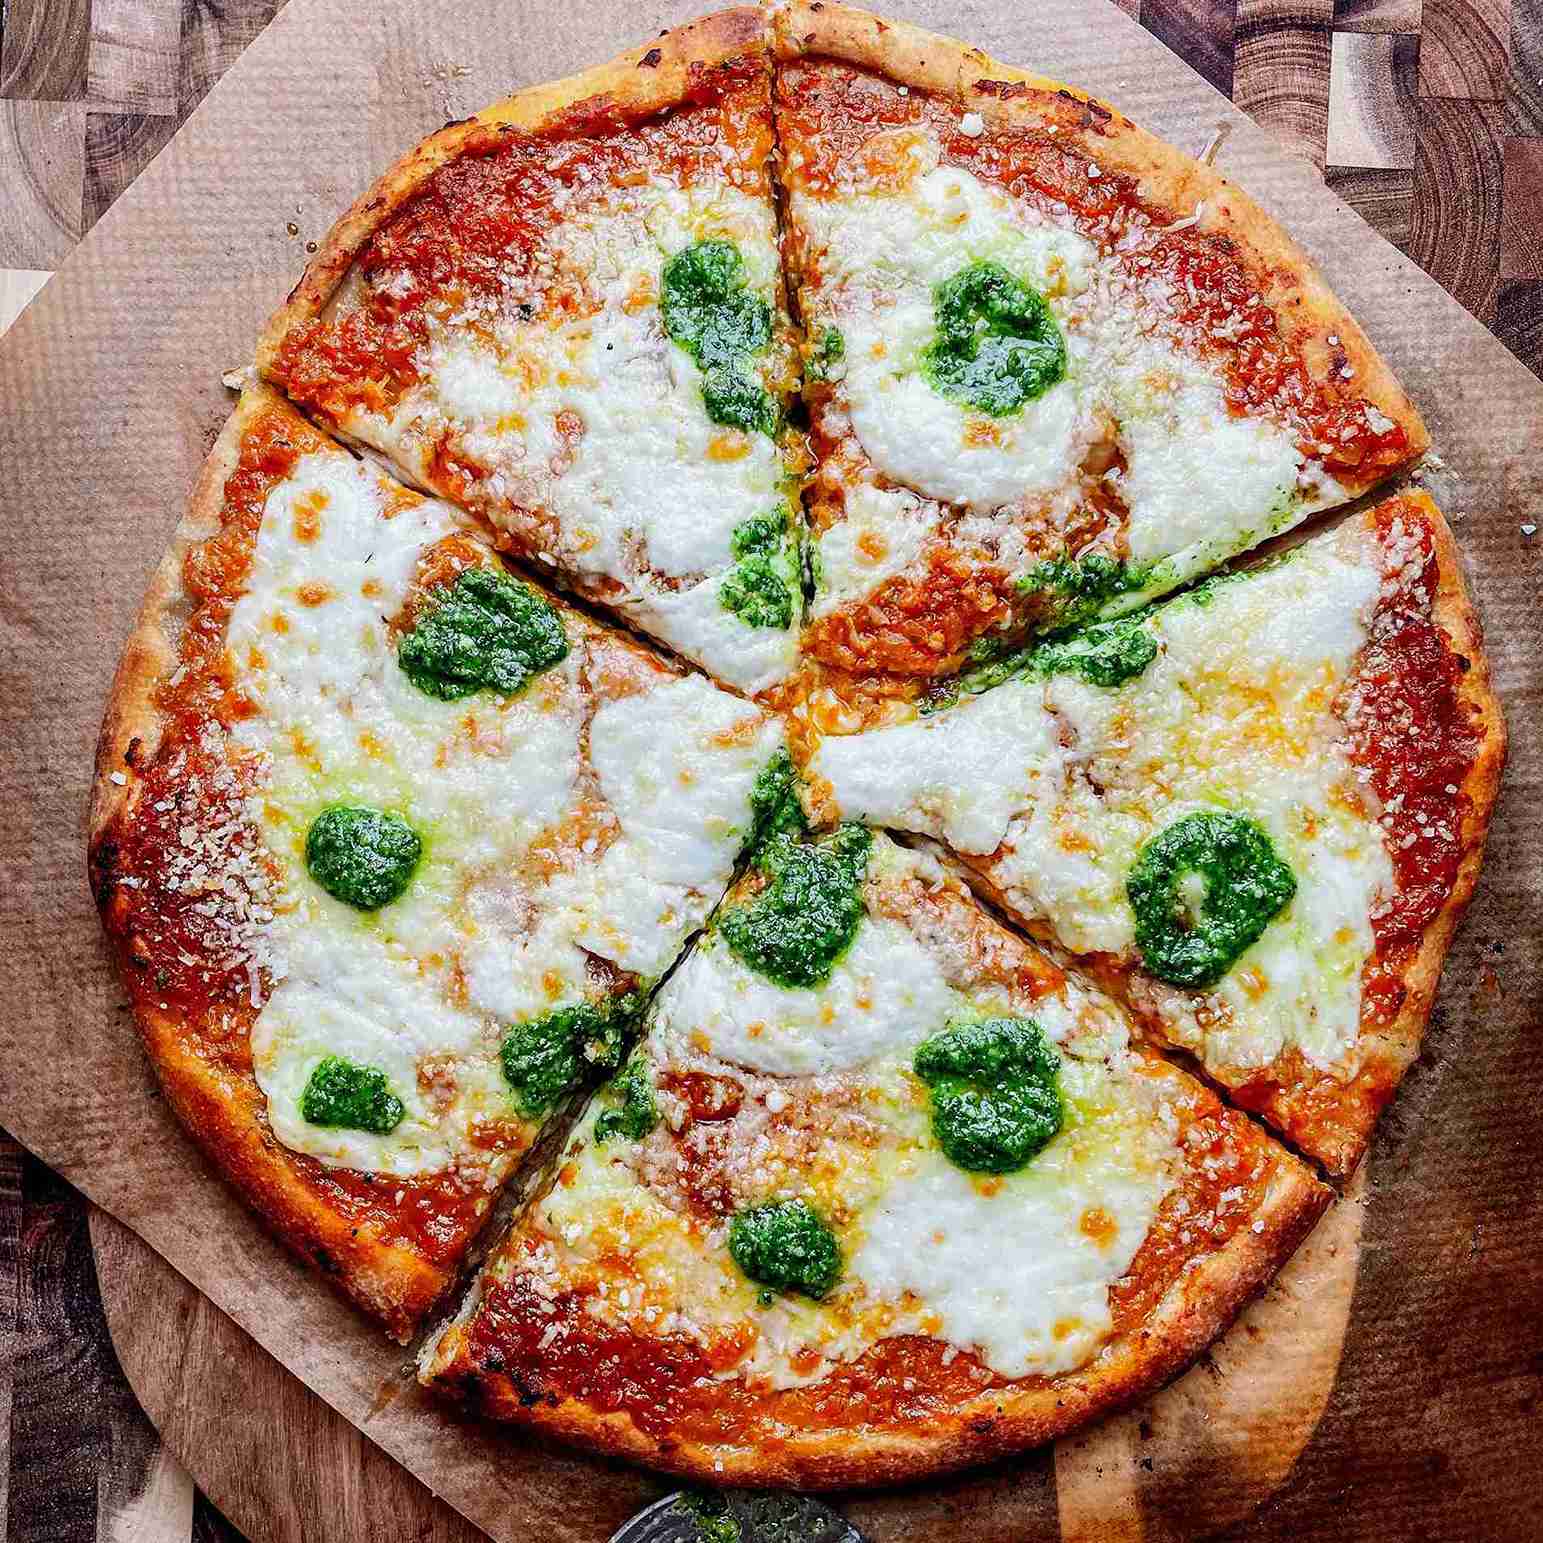
- Step 7: Spread a thin layer of tomato sauce and bake for about 5 minutes. This helps prevent a soggy crust, especially if using fresh mozzarella.
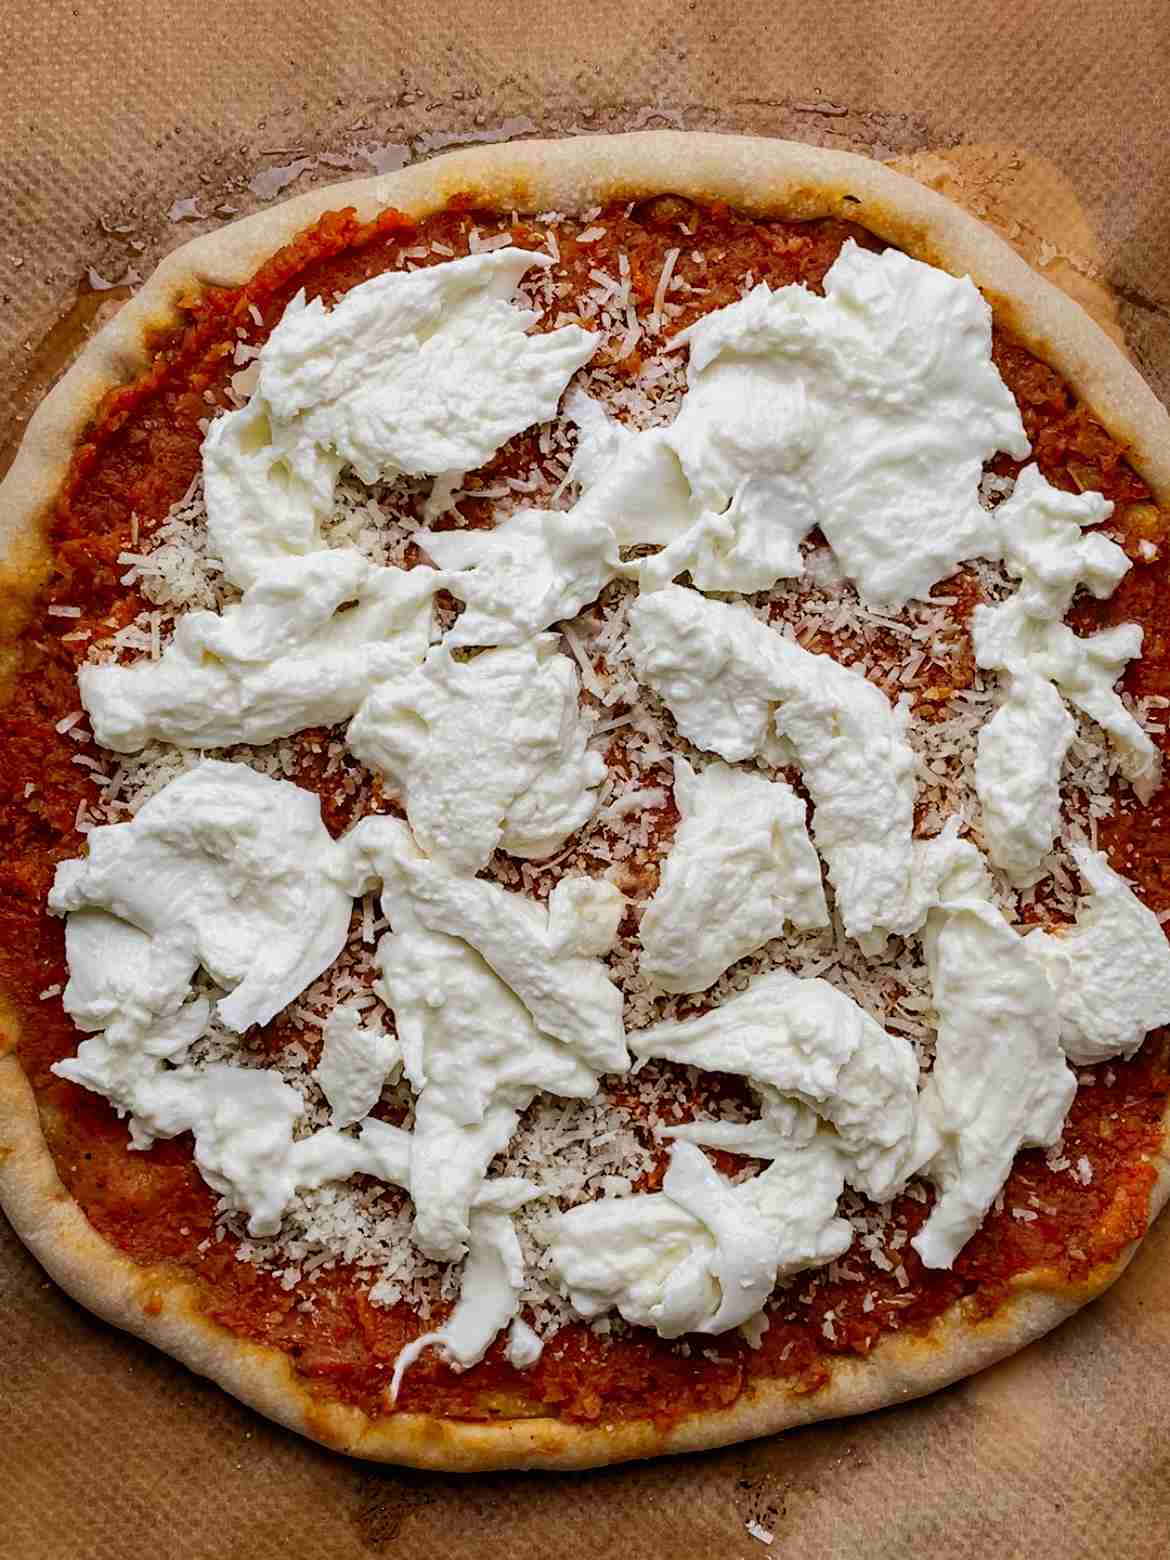
- Step 8: Add cheese and toppings, then bake for another 12-15 minutes until the crust is golden and the cheese is melted and bubbling.

- Step 7: Remove from the oven and finish with pesto, extra parmesan, or fresh herbs if desired.
Expert Tips
- Semolina on the parchment is worth it. It adds texture to the bottom of the crust and prevents the dough from sticking far better than regular flour. Fine semolina is what you want.
- Add water gradually. Hydration is everything with pizza dough. A too-wet dough is sticky and hard to shape; a too-dry dough is dense and tough. Add water bit by bit until the dough is soft and slightly tacky.
- Use freshly grated cheese. Pre-shredded cheese is coated in an anti-caking agent (usually potato starch) that prevents it from melting properly. You’ll get clumpy, uneven cheese instead of that beautiful pull. Buy a block and grate it yourself.
- Don’t overload the toppings. This is one of the most common homemade pizza mistakes. A thin, even layer of toppings gives you a better rise, a crispier crust, and honestly better flavor distribution. For a white pizza variation, try swapping the tomato sauce for homemade pesto – it pairs beautifully with fresh mozzarella and cherry tomatoes.
Storage
- Uncooked dough (fridge): Up to 2 days in a covered, lightly oiled container.
- Uncooked dough (freezer): Up to 3 months. Thaw overnight in the fridge, then come to room temperature before shaping.
- Baked pizza (fridge): Up to 3 days, wrapped or in an airtight container.
- Reheating: The oven is best, 375°F (190°C) for 5-8 minutes.
FAQ
Yes, use the same weight of active starter. It will rise faster (especially at room temperature) and may have a slightly less sour flavor than older discard. If your starter is very active, keep an eye on the dough so it doesn’t overproof.
Absolutely, and honestly it’s one of the best reasons to make this recipe. After kneading, rest for an hour then refrigerate in a covered, oiled container. It keeps well for up to 2 days – pull it out 20-30 minutes before shaping.
Yes. After kneading, divide the dough into portions, coat lightly with oil, and freeze in airtight bags for up to 3 months. Thaw overnight in the fridge, then bring to room temperature before shaping.
No problem. Preheat a heavy, inverted baking sheet or a cast iron pan in the oven instead. The key is that the surface is already hot when the pizza goes in – that’s what creates the crispy bottom.
Did you make this recipe?
If this recipe made it onto your pizza night rotation, I’d love to know! Leave a star rating and a comment below – it genuinely helps a small blog more than you know. And if you share it on Instagram, don’t forget to tag me @your_kitchen_lab so I can see your creations.
Savory Recipes
You might also like:

Sourdough Discard Pizza Dough
Ingredients
Equipment
Method
- In a large bowl, combine flour, sourdough discard, buttermilk, olive oil, salt, and honey.
- Add water gradually, a little at a time, mixing as you go. Stop when the dough is soft and slightly tacky but not sticky. You may not need all the water. Water should not be hotter than 110°F (43°C).
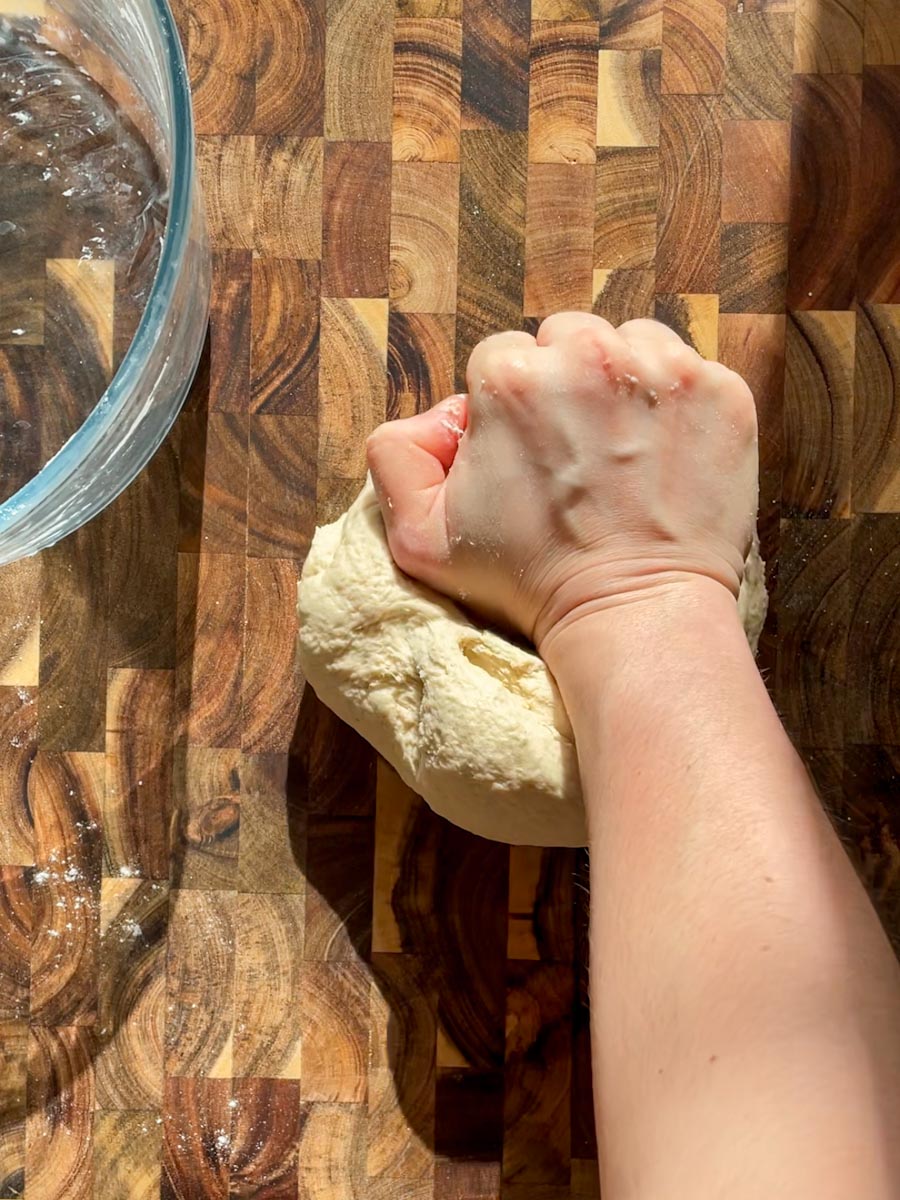
- Turn dough onto a lightly floured surface and knead for 5 minutes until smooth and elastic.
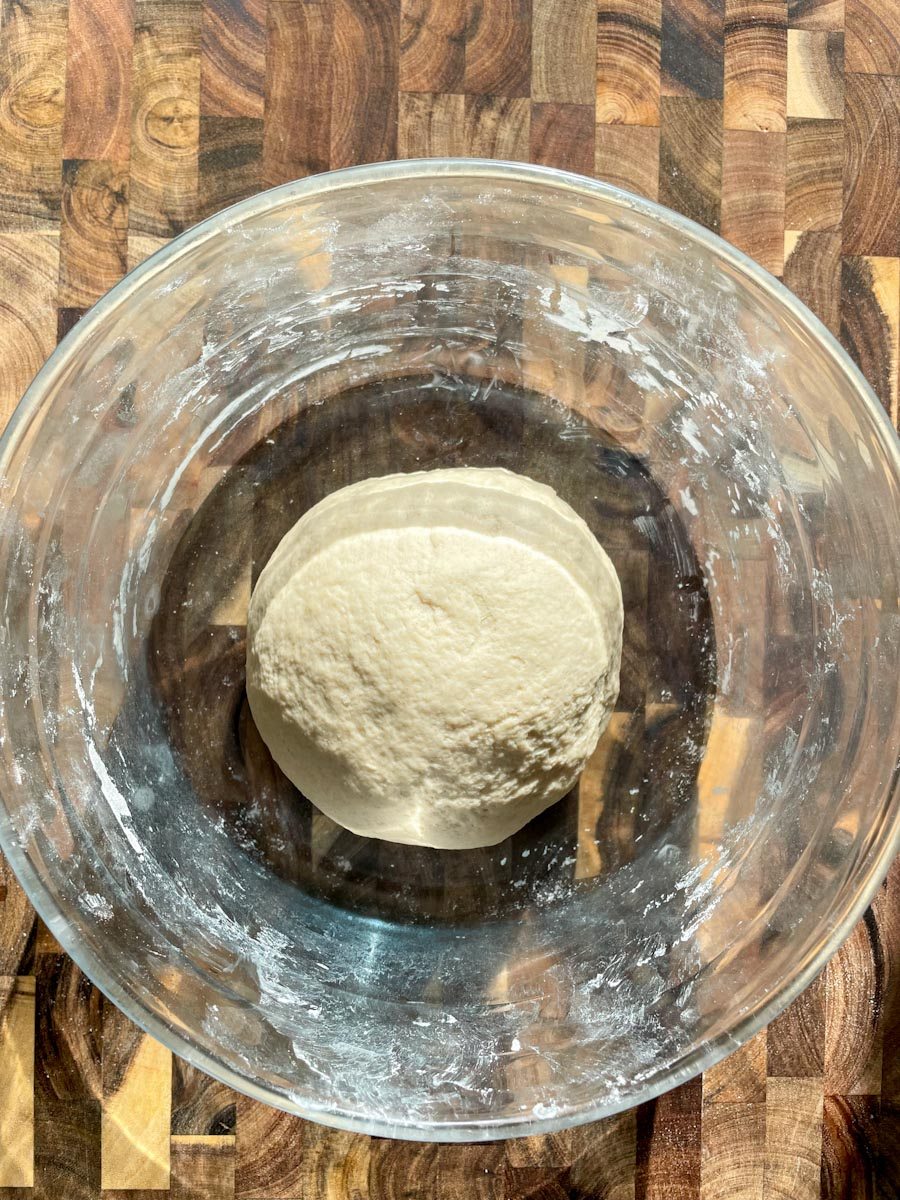
- Shape into a smooth ball: pull edges to center, flip seam-down, cup hands around dough and rotate clockwise to build tension. Place in a lightly oiled, covered bowl.
- Same day: rest at room temperature 30-60 minutes. Overnight: rest 1-2 hours, then refrigerate in a covered container for up to 48 hours.
- When ready to bake, preheat oven to 500°F (260°C) with a pizza stone or inverted baking sheet inside for at least 30 minutes. If using cold-fermented dough, remove from fridge 20-30 minutes before shaping.
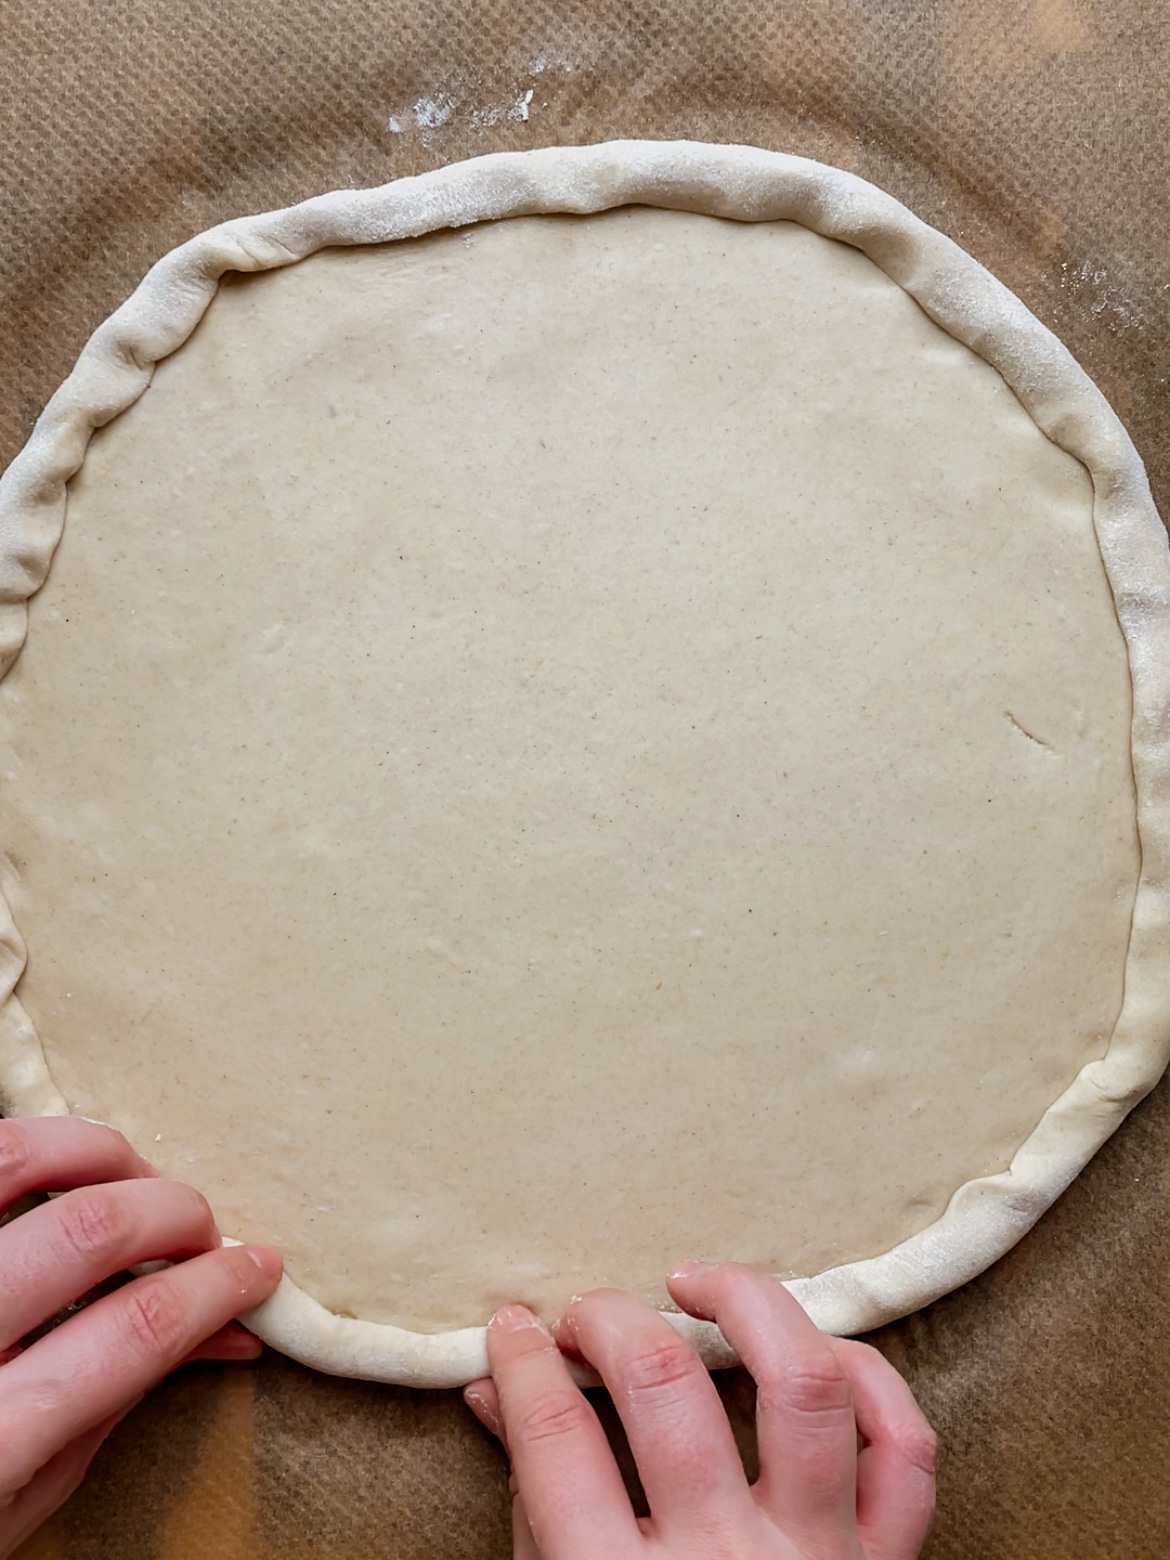
- Dust parchment paper with fine semolina. Press dough out from the center with your fingertips into a circle. Fold the outer edge over itself to create a raised crust border. Brush with olive oil.
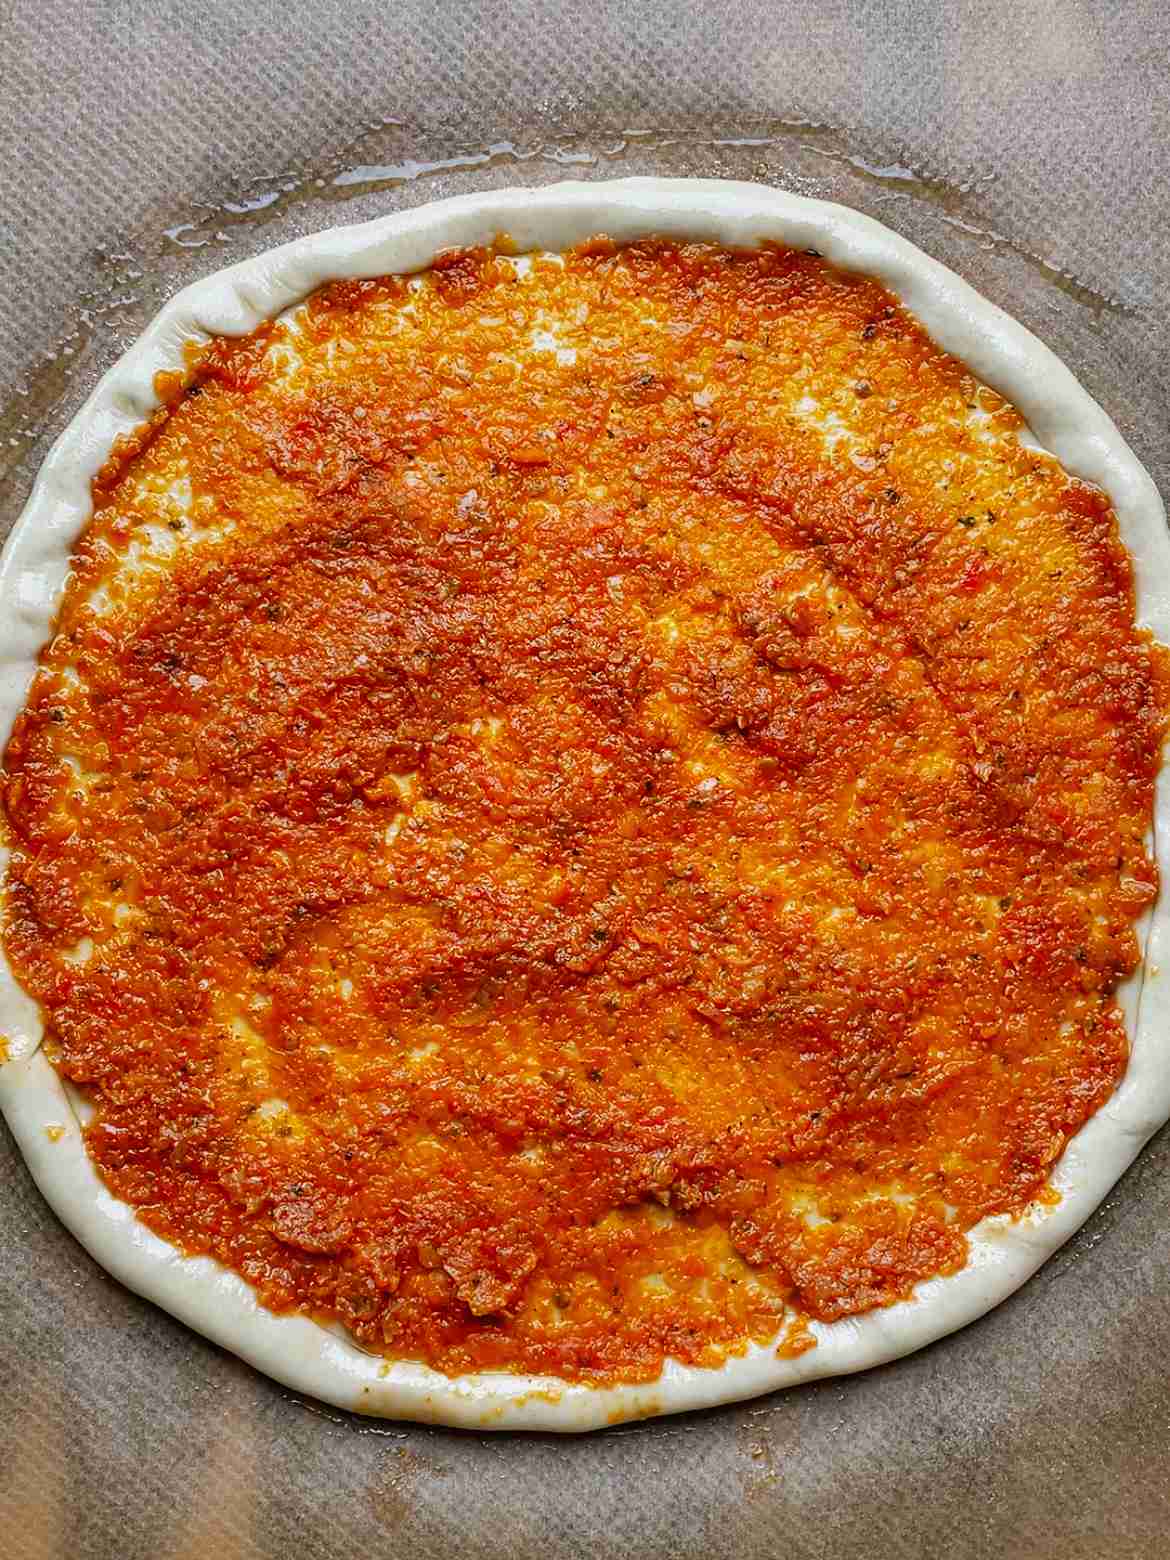
- Spread sauce (about ½ cup), then cheese and toppings (don't overload). For buffalo mozzarella, pre-bake the sauced crust for 5 minutes first, then add cheese and return to oven.
- Slide parchment onto the hot stone. Bake 12-15 minutes until crust is golden brown and cheese is bubbling.
- Rest one minute before slicing. Finish with pesto, extra Parmesan, or fresh basil. Serve immediately.
Notes
- Fresh shredded cheese melts far better than pre-shredded (which contains anti-caking agents). Buy a block if you can.
- If the dough springs back while shaping, cover and rest 5-10 more minutes – the gluten needs to relax.
- No pizza stone? Preheat a heavy inverted baking sheet or cast iron pan instead.
- Top with cashew pesto.
Comments
No Comments