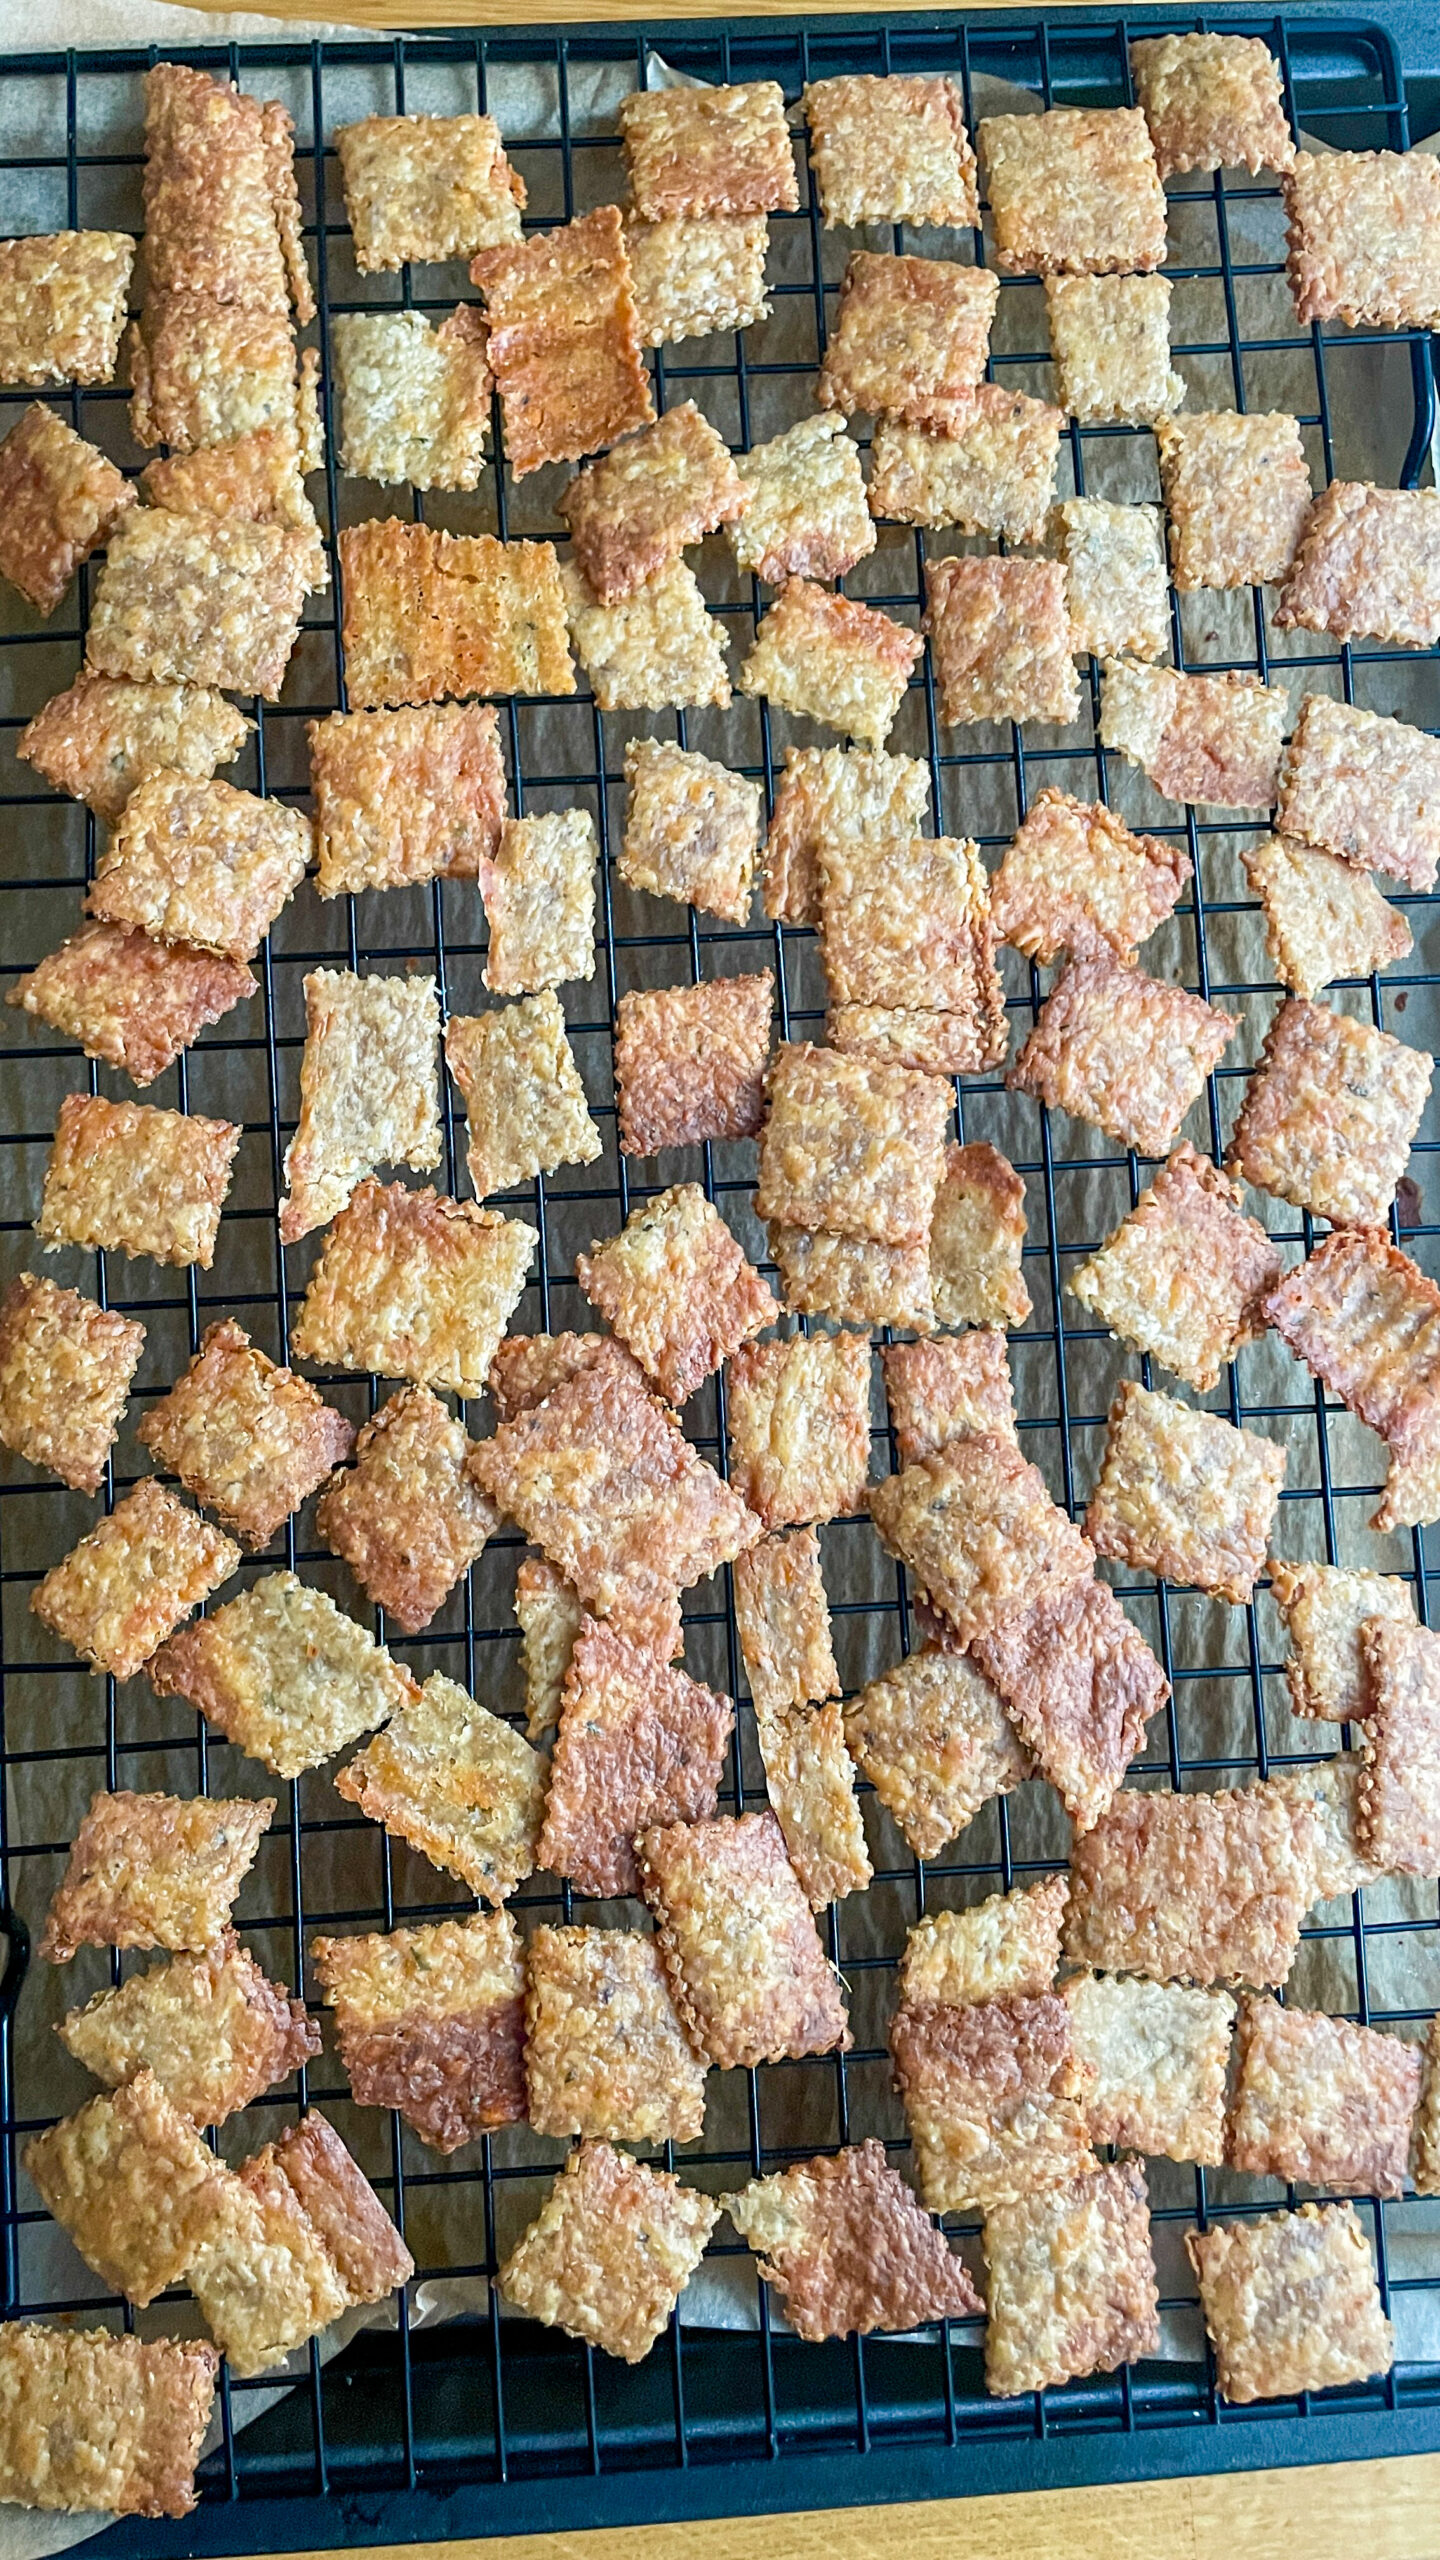
If you’ve been keeping a sourdough starter, you know the discard piles up quickly. These sourdough cheese crackers are my favorite no-fuss way to use it up, especially when I’m craving something savory and crunchy. What I love most? No added flour. Just starter, cheese, butter, and herbs. That’s it.
They’re thin, crispy, and ridiculously addictive. I find myself munching on them straight from the tray, no dip needed, though they’re amazing with pretty much anything.
Why You’ll Love These Sourdough Crackers
-
Zero added flour – just pure sourdough starter
-
Perfect use for discard – or even active starter!
-
Crispy and cheesy – great texture and flavor
-
Customizable – change the herbs or cheese to fit your vibe
-
Quick and easy – ready in 30 minutes
Ingredients You’ll Need
Here’s what goes into these simple, cheesy crackers:
-
Butter (30g | 2 tbsp) – melted
-
Sourdough starter (200g | ¾ cup + 2 tbsp) – discard or active, both work
-
Salt (½ tsp)
-
Garlic powder (½ tsp) – optional, but adds a nice kick
-
Dried oregano (½ tsp) – or try rosemary, thyme, or Italian seasoning
-
Parmesan cheese, finely grated (50g | ½ cup) – or use cheddar, Gruyère, or any hard cheese you love
How to Make Sourdough Cheese Crackers
-
Preheat your oven to 180°C (350°F). Line a baking sheet with parchment paper.
-
Melt the butter and pour it into a mixing bowl.
-
Add sourdough starter, salt, garlic powder, oregano, and grated Parmesan. Stir everything together until smooth. The mixture will be more like a thick batter than a dough.
-
Spread the batter onto your parchment-lined baking sheet. Use a spatula to spread it as thin and even as possible. This is key for getting crispy crackers, thin is everything here!
-
Bake for 10 minutes, then take it out and cut into cracker-sized pieces using a pizza cutter, knife, or pastry wheel.
-
Return the tray to the oven and bake for another 20 minutes, keeping an eye on them. If some crackers brown faster around the edges, take those out and let the rest continue baking.
-
Once all your crackers are golden and crisp, remove from the oven and let them cool completely. That’s when the magic happens, they’ll crisp up even more as they cool.
My Tips
-
You must spread the batter thinly for the best crunch.
-
If the edges start browning too fast, remove them early and let the rest finish.
-
Customize with different herbs or cheeses—think rosemary and Gruyère, or thyme and cheddar!
What to Serve With These Crackers
These crackers are great on their own, but here are a few dip ideas:
-
Cream cheese with chives
-
Hummus
-
Pesto
-
Olive tapenade
-
A spoon of homemade tomato jam
They also work beautifully on a snack board with nuts, fruits, and more cheese. You really can’t go wrong.
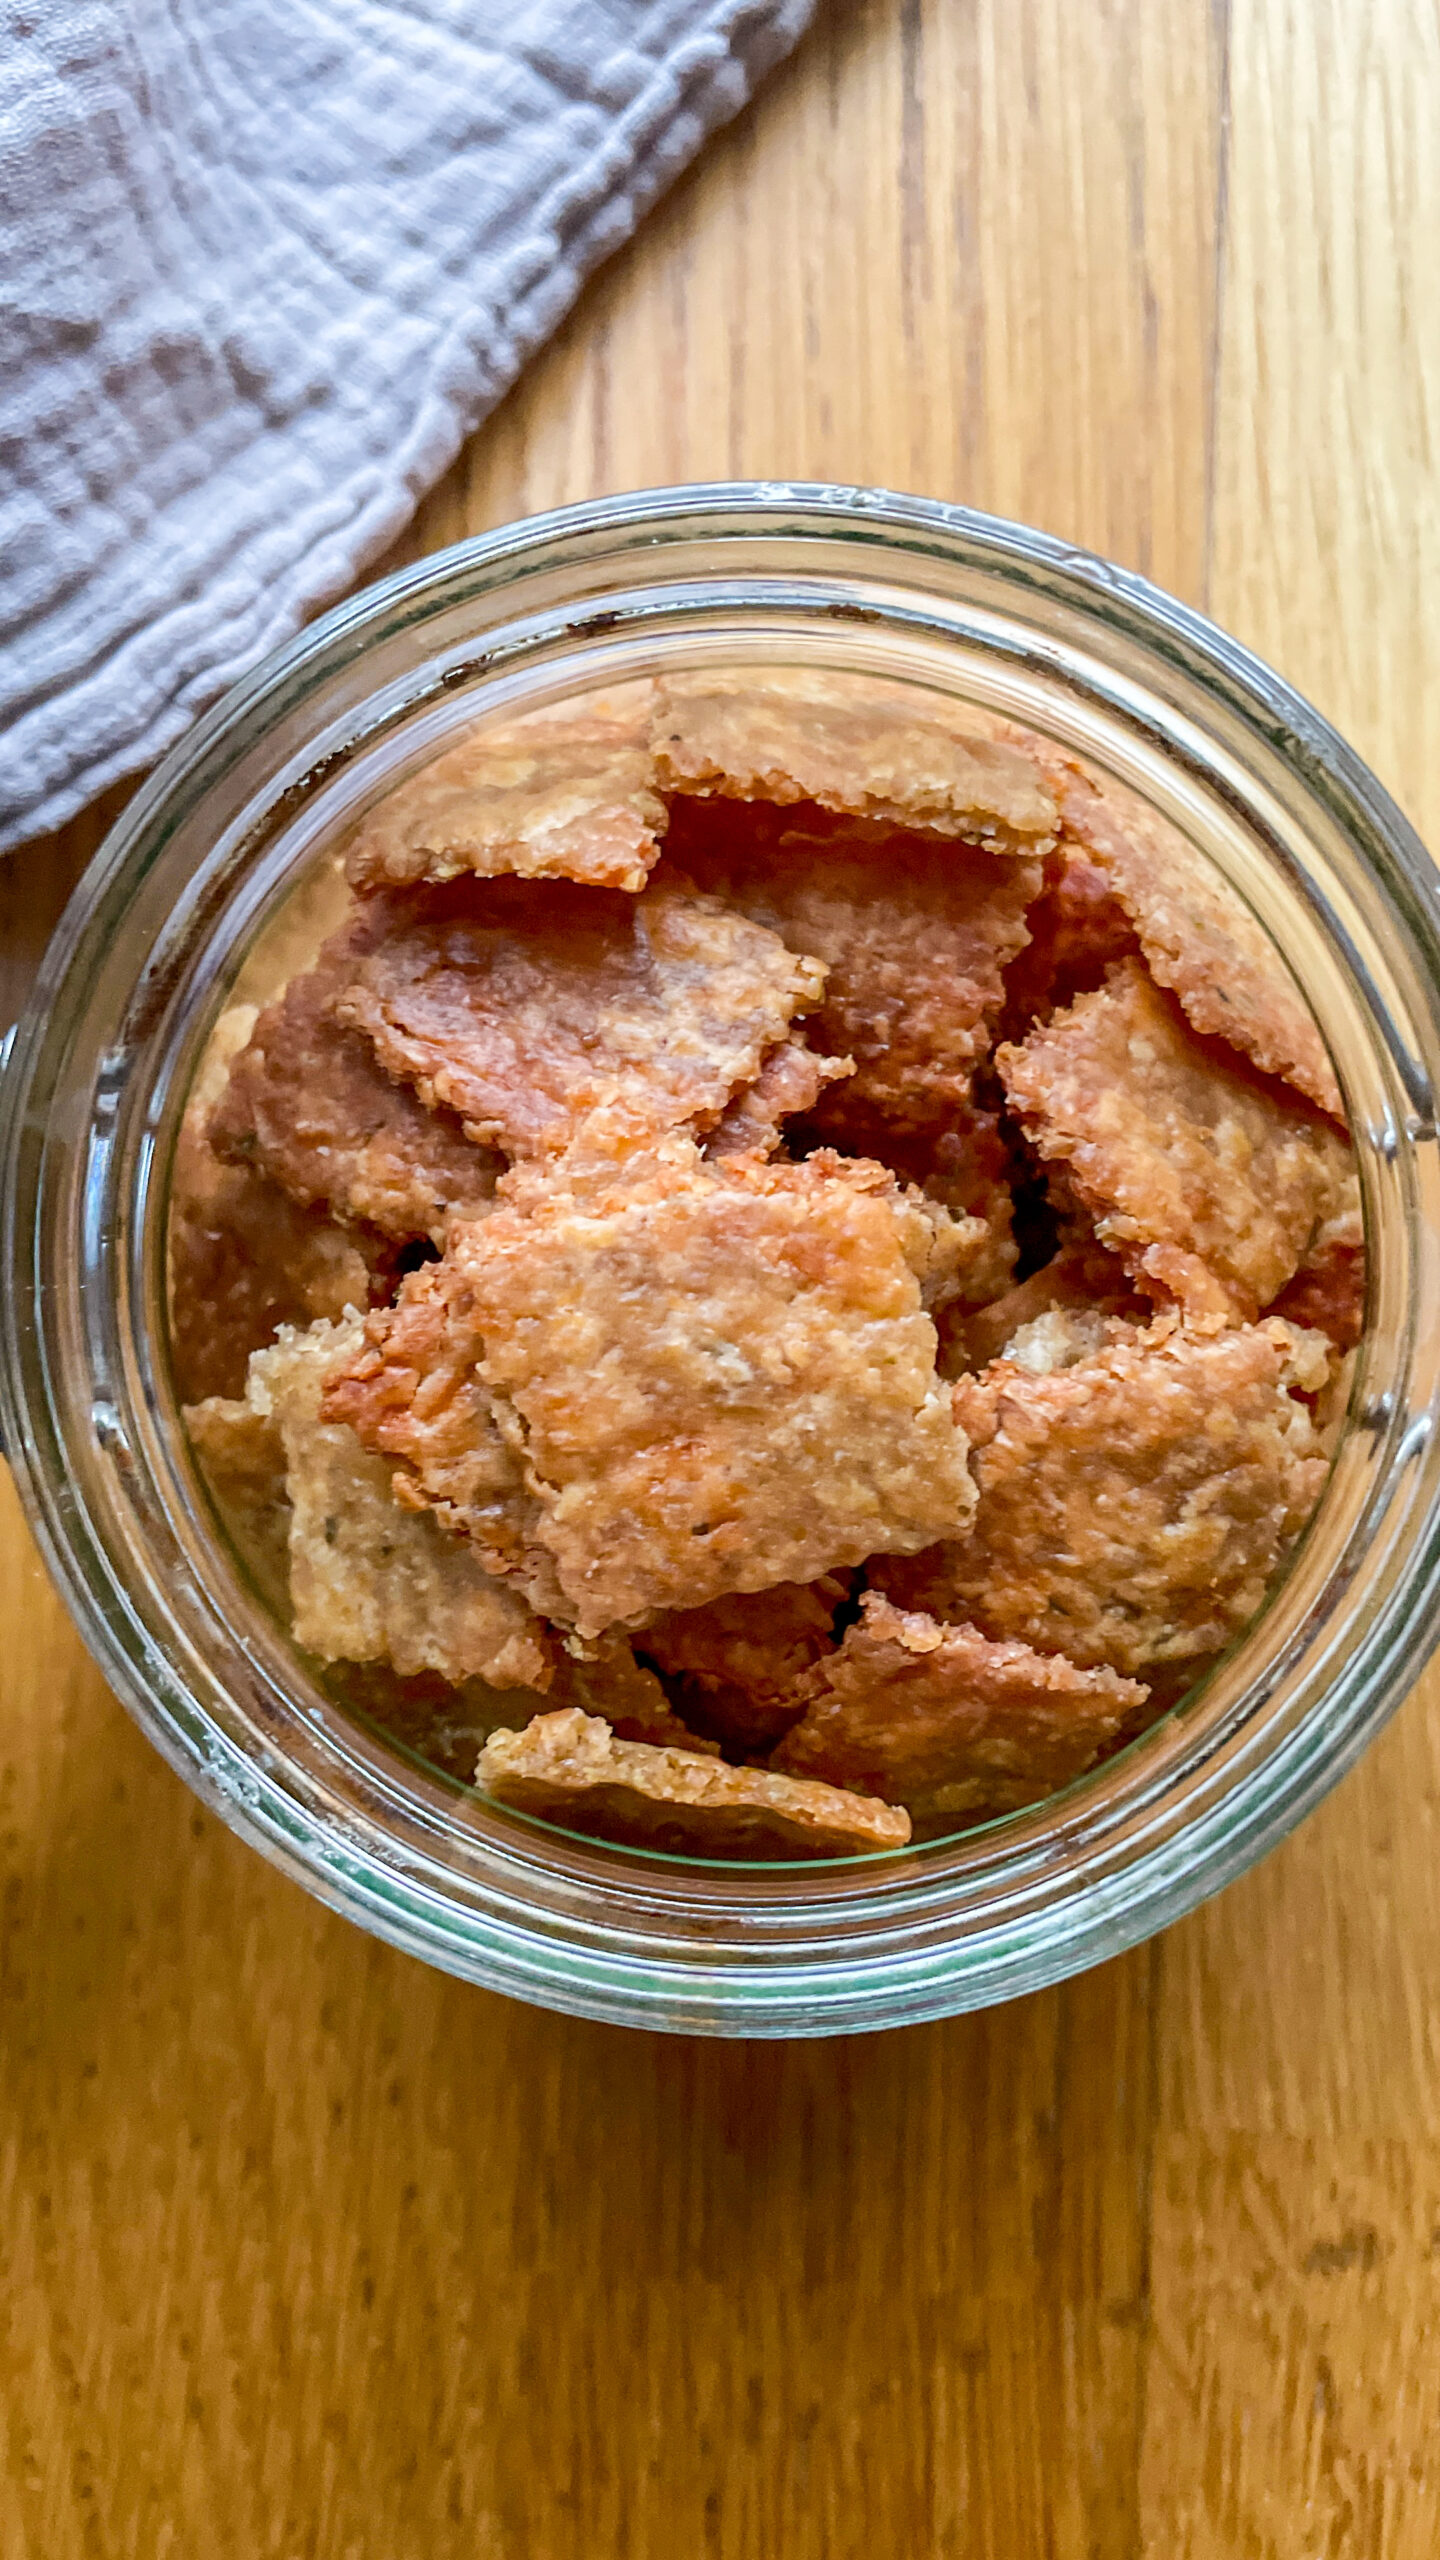
Storage Tips
Store your crackers in an airtight container at room temperature for up to 3 days.
Note: If they lose their crispiness, just pop them back in the oven for a few minutes to re-crisp. Works like a charm!
Sourdough Cheese Crackers (No Added Flour)
Ingredients
Method
- Preheat oven to 180°C (350°F). Line a baking sheet with parchment paper.
- In a medium bowl, mix the melted butter, sourdough starter, salt, garlic powder, oregano, and Parmesan cheese until smooth.
- Pour the mixture onto the prepared baking sheet and spread it out as thinly and evenly as possible. Use a spatula to get the layer very thin, this ensures crispy crackers.
- Bake for 10 minutes. Remove from oven and use a pizza cutter or knife to score the crackers into small squares.
- Return to the oven and bake for another 20 minutes. Keep an eye on them, remove any crackers that brown too quickly around the edges and let the rest finish baking.
- Once golden and crisp, remove from oven and let cool completely. They’ll crisp up even more as they cool.
Notes